Cosmic Cuisine: ‘Hocus Pocus’ Buns
Everyone’s favorite witches are back again. Almost thirty years after the original Hocus Pocus came out, the sequel, Hocus Pocus 2 has finally arrived on Disney+. Obviously, we had to celebrate the return of Winnie (Bette Midler), Sarah (Sarah Jessica Parker), and Mary (Kathy Najimy) with these magical Hocus Pocus buns which are the perfect treat to enjoy while watching Hocus Pocus 2.
The Sanderson sisters would thoroughly approve of the little trick involved with the disappearing marshmallow. So why not try these sweet treats that are reminiscent of a cinnamon roll out for a Halloween treat? These yummy buns pair perfectly with a warm cup of witch’s brew.
Hocus Pocus Buns
These magic little buns will put a spell on you! They are a tasty twist on the classic cinnamon roll that are easy and quick to make. This recipe is extremely kid friendly. Not only will they love helping you make them but when the time comes to eat them they'll be asking "Where did the marshmallow go?" Just tell them it's magic and smile.
Ingredients
- 3 packages of crescent rolls (8 rolls each)
- 24 marshmallows
- cinnamon
- 1 stick butter (melted)
- powdered sugar
- milk
- food coloring
Instructions
- Preheat oven to 375°F.
- Cover baking sheets with parchment paper and set aside.
- Open crescent rolls (I suggest opening them one at a time as needed), roll out and separate into individual triangles.
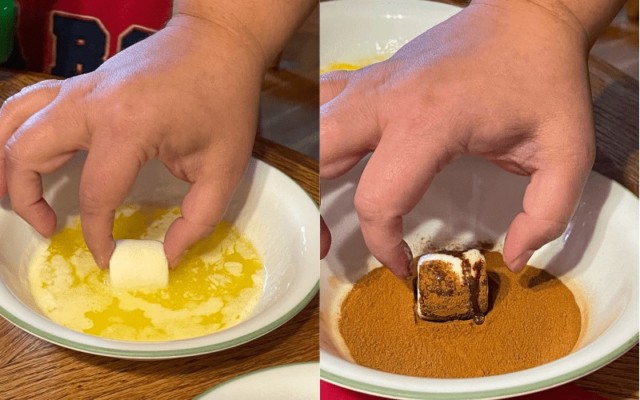
- Melt butter in a small microwave safe bowl.
- Place cinnamon in a second small bowl.
- Roll marshmallow in melted butter, then in cinnamon.
- Place the butter and cinnamon covered marshmallow on a crescent roll and wrap the dough fully around the marshmallow. Make sure to fully seal all the seams or the marshmallow will leak out.
- Place two inches apart on baking sheet.
- Bake at 375°F for 11 to 14 minutes, until golden brown.
- Cool for 5 to 10 minutes.
- While they're cooling, mix up the icing.
- Start with two tablespoons of powdered sugar in a small bowl. Add a few drops of food coloring. Add milk slowly until a drizzling consistency is reached.
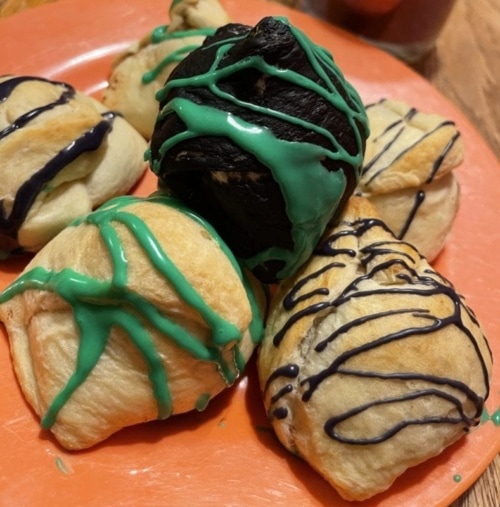
- Drizzle icing over the buns.
- Enjoy. These are best warm but are always yummy.
Notes
- This recipe is a great one for kids. They can easily roll the marshmallows in the butter and cinnamon and will be all the more amazed when the marshmallows they put in the rolls "disappear".
- Using parchment paper is critical. Not only will the rolls not stick, but if any marshmallow leaks out it won't stick either. Parchment paper is a wonderful, unsung hero of the baking world. Always use parchment paper.
- Dipping your finger in water and running it along the edges of the dough before sealing the dough can help the seams to stay sealed while baking.
- We used green and purple for the icing, you can pick whatever colors you'd like and make them whatever shade you like.
- When making the icing, be very careful with the milk. A little goes a long way and it's easy to go from not enough to way to much in just a few drops.
- If you do get too much milk in the icing just add a little more powdered sugar.
A family affair with this kid-friendly recipe
Kids love helping out in the kitchen and these buns are great for all ages. Even the littlest hands can roll the marshmallows in the butter and cinnamon. Older kids can seal the buns. Drizzling the icing is fun for everyone if you don’t mind some mess.
Kids especially love eating these tasty treats. The mystery of what happened to the marshmallow will have them asking where it went over and over. I told my son it was magic, maybe someday I’ll let him in on the secret.
Some kitchen magic for these Halloween treats
I’d like to take a minute to talk about a magical little item that should be used liberally in all kitchens, parchment paper. If you’re not familiar with it, parchment paper is kinda what it sounds like, paper. It comes on a roll like aluminum foil and it is a godsend for baking. Place this magic paper between the pan and anything you’re baking and it won’t stick, no grease is required!
Cookies, cake, brownies, rolls, you name it, parchment paper protects it. It works so well that sometimes when I pull a tray of cookies out of the oven too fast the cookies fly to one end of the pan. One sheet can be used multiple times too. Eventually, the paper will get brittle but it takes a lot of baking. When that happens just throw it away and get a new piece.
And an added little bonus, clean-up is a breeze when you’re done, just throw the paper away and your pan is nice and clean underneath, MAGIC! I can’t stress enough how wonderful parchment paper is. If you don’t have some, get some and enter a new level of baking.
Check those seals on your Hocus Pocus buns
Properly sealing the seams of the buns is really important. If they aren’t fully closed the marshmallow will leak out. The buns will still taste great but they’ll be messier, and it will be obvious to little helpers where the marshmallows went!
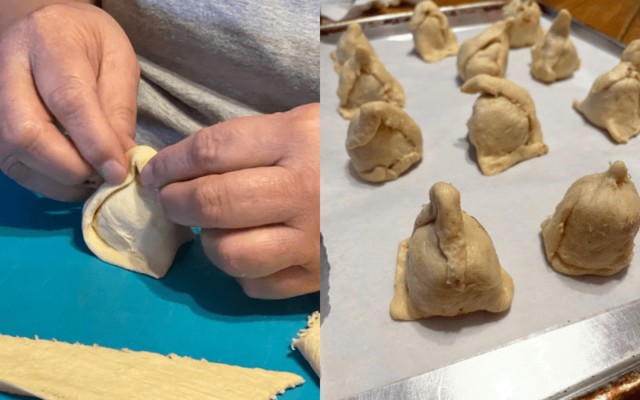
If you’re having trouble getting the dough to stick together, try dipping your finger in water and running it along the edges before pressing them together. This helps to make the dough stickier so it stays together.
Easy on the icing!
These enchanting buns look even more magical once they get their icing on top. I recommend using a fork or spoon to achieve a perfect drizzle on top. Too much icing gets a bit too sweet. These buns only need a little extra pizzazz, not lots of sugar since an entire marshmallow (read “big glob of sugar”) is inside.
So if you’re using a spoon just drizzle thin lines back and forth. If you opt for the fork, scoop a small bit onto the fork and quickly shake your hand back and forth over the buns. This will create a nice effect and should keep the icing in thin lines.
Fun with colors in your Hocus Pocus buns
We chose to make our icing green and purple, those felt like magical and witchy colors to us. You can make your icing whatever color you want. Add the coloring a couple of drops at a time until you’re satisfied with the color so you don’t go too far. If by chance you do make the icing too dark just add a few drops of milk and a little more powdered sugar to lighten it back up.
We also experimented with dying the dough itself on a few of them. We were trying to make them look like witch hats. So we mixed some green and red food coloring until it was black and painted it on the finished bun with a clean paintbrush. They did look black when they finished baking but the buns rounded out so much that they didn’t really look like hats anymore.
Also, they turned our mouths pretty black (it did come off with a drink of water though). I wouldn’t recommend doing the same. But it could make a nice trick at a party, dying everyone’s mouths, maybe even paint them a variety of Halloween colors for a funny prank. Trick and treat!
So have fun with these great little buns and enjoy the magic of the season. Happy Halloween! And watch Hocus Pocus 2 only on Dinsey+! If you haven’t already, check out our other Halloween Cosmic Cuisine, which will pair nicely with your Hocus Pocus buns, our delightful warm, and wicked witch’s brew!
Loose Threads and Thoughts on a Hocus Pocus 3
Book Review: Hocus Pocus and The All-New Sequel by A.W. Jantha